Email campaigns are a powerful tool for dental practices to enhance communication and strengthen relationships with their patients. By delivering timely and relevant information—such as appointment reminders, oral health tips, treatment follow-ups, and special promotions—email outreach helps build trust, boost patient retention, and encourage consistent care. Additionally, it provides an effective way to share updates on new services or technologies, reinforce brand loyalty, and create a more organised, patient-centred experience.
¶ Bulk mailing with DentalPlus
The mailing campaign can be completed in three simple steps: create the message, choose the target patient group, and send it out. Be sure to respect your patients' communication preferences and ensure compliance with GDPR when sending different types of messages.

Click here to watch the webinar on YouTube
DentalPlus is not designed for sending large-scale marketing emails to thousands of recipients. If you have a large mailing list, please refer to the second part of this article for recommended solutions and best practices. Click here…
¶ Step 1: Create the document you will send to patients
- Navigate to the Admin section and select Documents from the top menu.
- Click the New Document button.
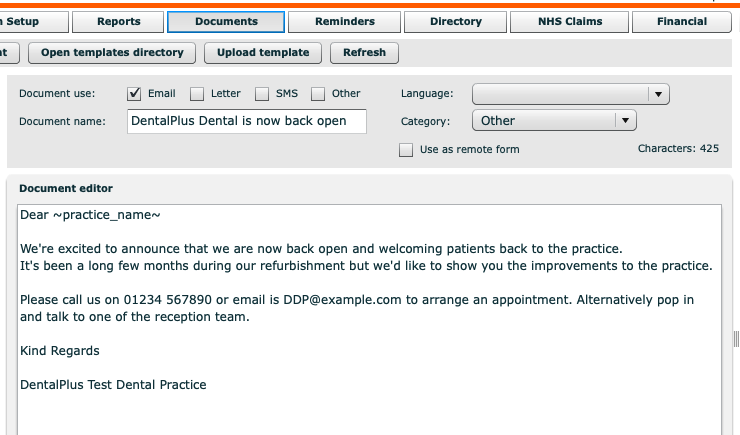
- Check the Email option and enter a name for your document.
- Write the message content you wish to send to your patients.
- Click Save Document to finish.
Before proceeding to the next step, you can create an email signature that includes your logo or practice details.
¶ Step 2: Choose the target patient group
If you are emailing all patients, you might want to use the Patient List report in the Patients section. If you are only sending emails, use the Email Addresses report in the Patients section.
Choose the mailing preferences of the current report and the system will use the contact method that was previously set up by the patient.
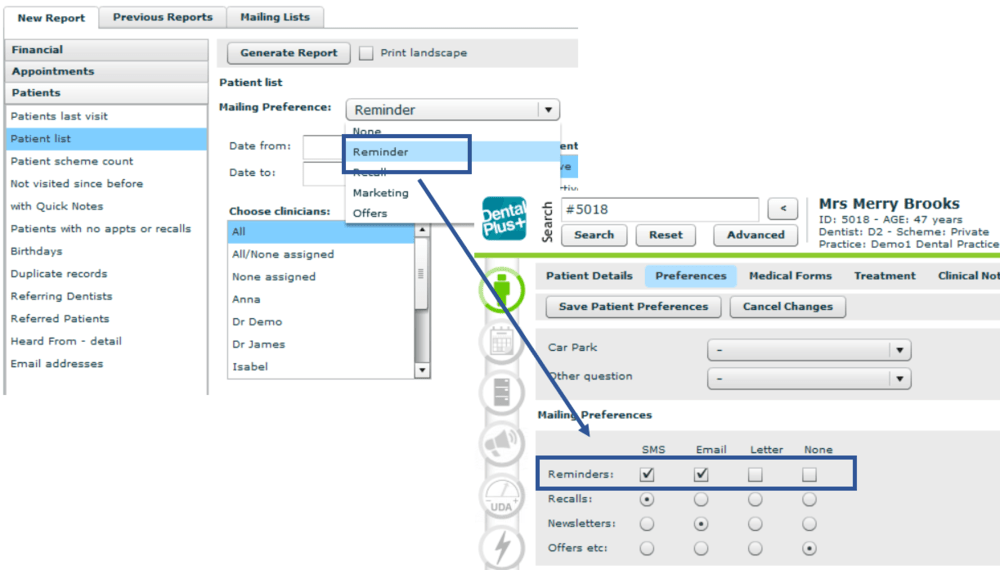
Click Generate Report. You will get a list of patients, showing their dentist and hygienist recall dates
To send the documents, click the Create Document button
¶ Step 3: Send it out
Choose the document templates you created earlier in the Email Doc and SMS Doc at the top.
The system generates a list of patients with preferred contact preferences. If you want to override the preferences, you can use the ‘ Set all… to…’ option to override the contact method. Be aware of GDPR issues in doing this.
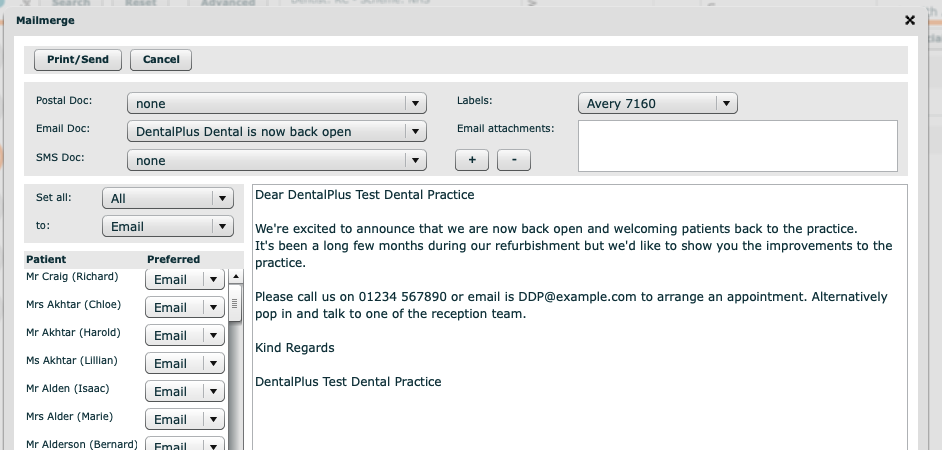
If you click on one of the patient's names, you will view a preview of the document that will be sent.
Once you are ready, click the Print/Send button.
¶ Email Signature as a Powerful Branding Tool
To make your emails more engaging and memorable, DentalPlus lets you create a custom email signature. You can include images, formatted text, and clickable links for a polished, branded look. This helps reinforce your brand and adds a professional touch to all communications.
Where to find it: Admin section → System Setup → Email Signature
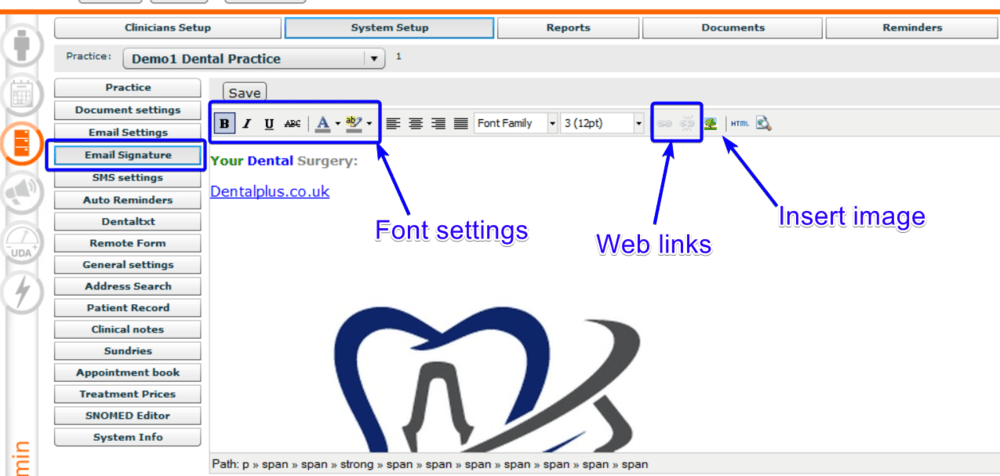
The screen is divided into two sections: the toolbar and the editor. You can type or paste text. The toolbar lets you change text style, add web-links and pictures.
1) How to change font style…
- Type or copy-paste any text
- Select it using the mouse
- Click on the font style icon and select the options
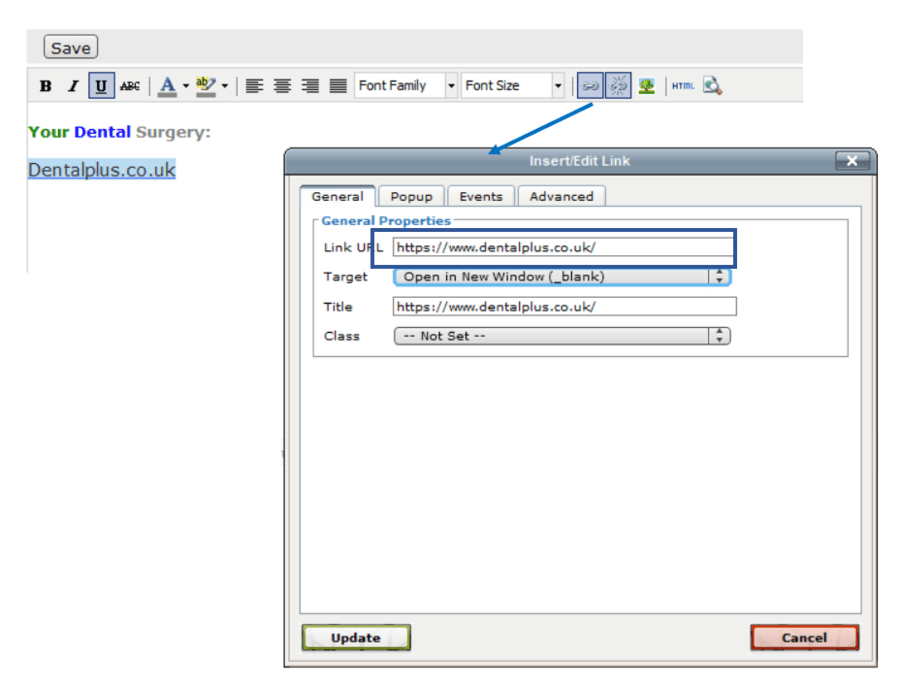
2) How to add a clickable web link…
- Type or copy-paste any text
- Select it using the mouse
- Click on the ‘Chain’ icon
- in the popped-up window add the URL: practice website address
- Click ‘Insert’
3) How to insert an image…
As an image, you can choose any one already posted on your website.
- Go to your website and choose any image
- Right mouse click on this image
- Select ‘Copy image address’ from the context menu
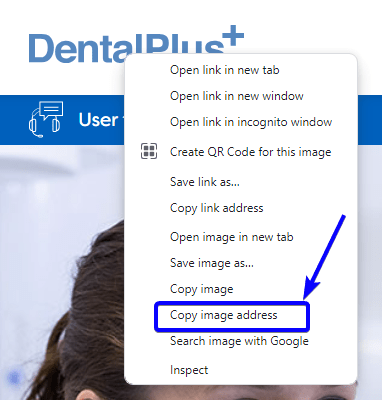
- Navigate to your email signature editor and click on the 'Tree' icon
- Paste the copied image address
- Click insert
- Your email signature will now feature the image you selected

As a result, your patient will receive all emails with a signature.
¶ Bulk Mailing with MailChimp
While DentalPlus supports patient communication by email, it is not intended for sending large-scale marketing emails to thousands of recipients. Most email servers impose sending limits, which can restrict mass mailings.
For effective email marketing, we recommend exporting your patient email list from DentalPlus into a dedicated platform such as MailChimp or MailJet . These services are specifically designed for marketing communications and can handle bulk sending with ease. MailChimp, for example, allows you to send emails to up to 2,000 contacts for free, with affordable plans available for larger campaigns.

For more information, please read the help article
and watch help video
Together, DentalPlus and MailChimp provide a powerful and efficient solution for marketing your dental practice.
¶ Create a list of emails in DentalPlus
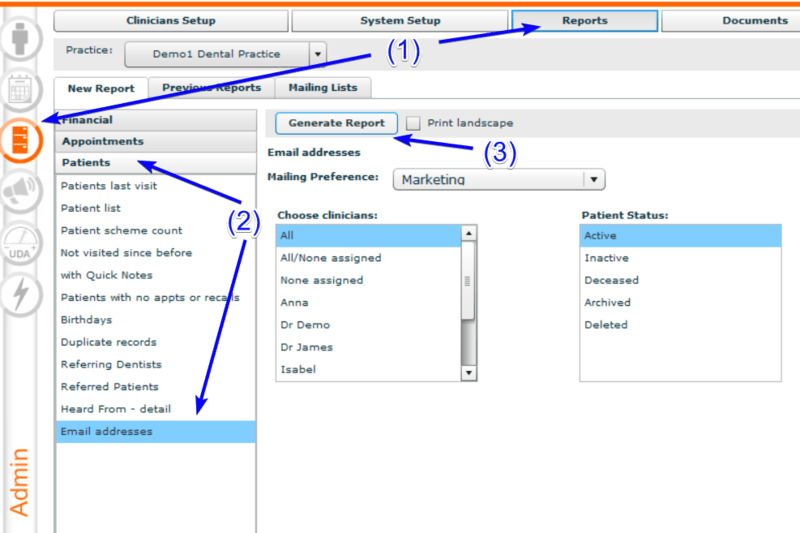
The first thing you will need to do is to create a list of patients you are going to send emails. The best report to use is ‘Email addresses’.
(1) Go to the Admin Section → Reports
(2) In the ‘Patients’ tab, select ‘Email addresses’ report.
You have a lot of options to choose from: all patients, certain clinicians, and the status of the patient.
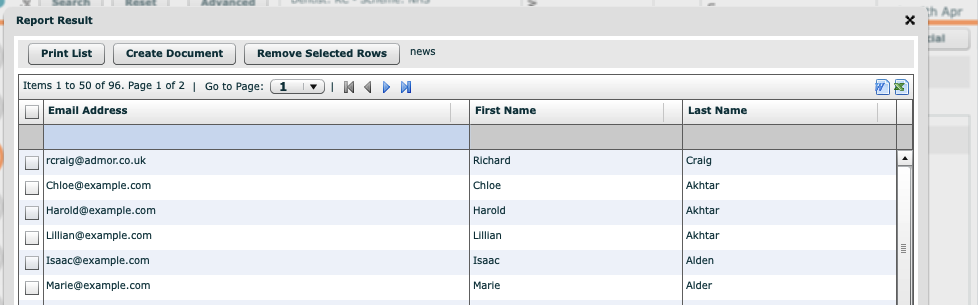
(3) Run a report
(4) When the report has finished click the ‘Excel file’ icon at the right top
(5) Export data and Save the results
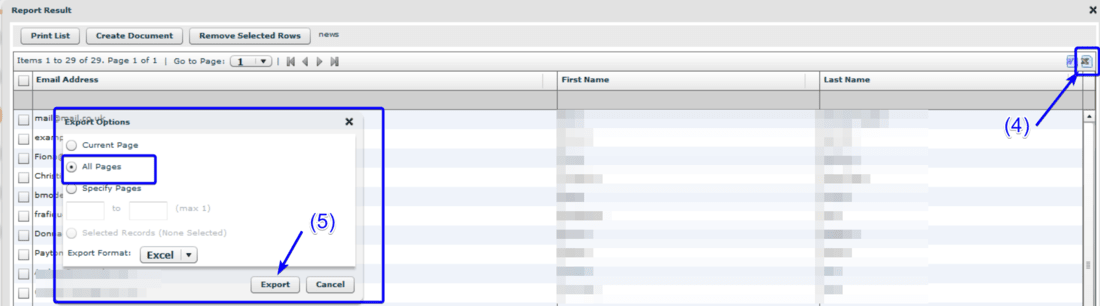
The list of patients' emails is created and ready to use
¶ Create a Campaign in MailChimp
The first thing you will need to do is to sign up with MailChimp.
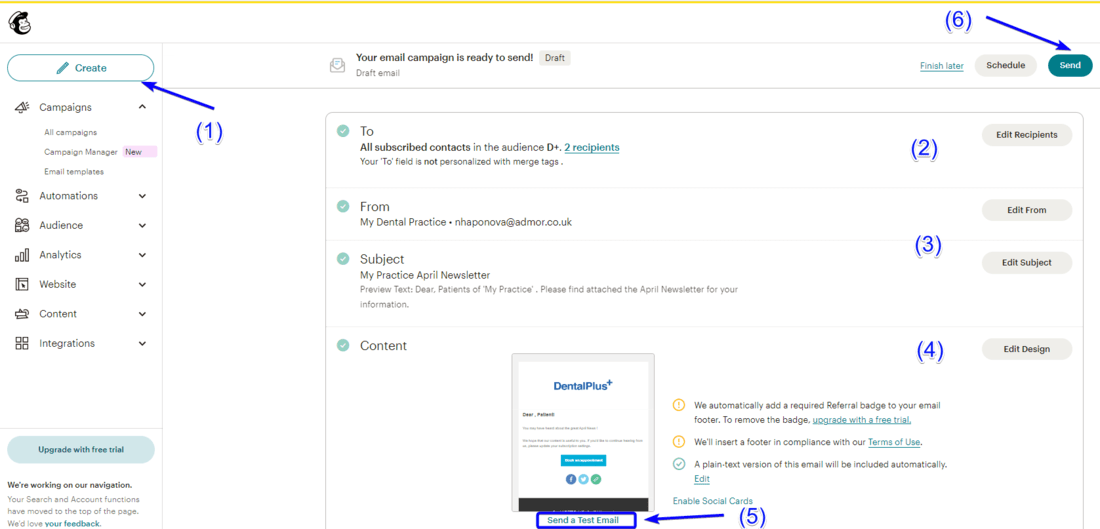
(1) Create a New Campaign.
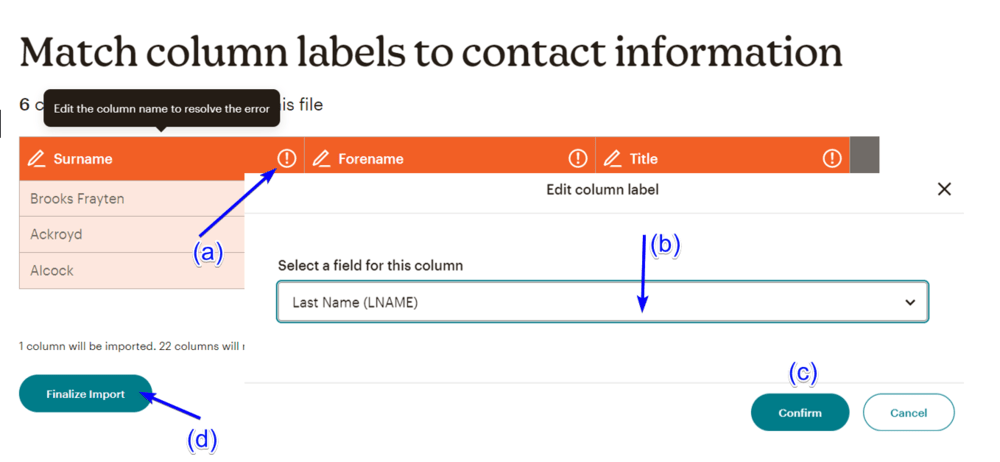
(2) Add the list of recipients by importing excel-file that was created in DentalPlus. Match column labels (a) to contact information (b). This will help to send personalised emails with Merge Tags.
(3) Add your email and the subject of the mailing campaign
(4) To design your email, navigate to the Content section and click Design Email.
(5) Send a Test email to ensure that all in the best
(6) Once you are ready, click the Send button or schedule the campaign